Pinterest

Showing posts with label Stampin up. Show all posts

Saturday, March 1, 2014

Who Doesn't Like Fun Mail??


Happy Saturday!!  And we are getting more snow today, because we don't have enough.  Poor Dalwhinnie tries walking in the backyard and she struggles as she cracks the ice on top of the snow and falls up to her armpit into snow drifts.   

Today I want to share with you  Paper Pumpkin.   Do you know what Paper Pumpkin is?   Paper Pumpkin is a monthly subscription from Stampin' Up! where you get a fun little package of goodies every month in the mail.  And who doesn't like fun mail.  And it costs only $24.95/month.   To be completely honest, when they started the program almost 2 years ago, I was not sold.   I saw a couple of the boxes that Denise was getting and I wasn't excited about it.  I have been scrapbooking and papercrafting for 16 years, I have seen so many trends etc come and go, I am looking for new and exciting, something I haven't seen before, yet I want to add to my growing stash.   Years ago I tried the monthly scrapbook kit in a pizza box and I ended up with a lot of product that I didn't use but paid money for.   So I sat on the fence, I didn't want to have a collection of boxes of unopened kits sitting in my studio reminding me of the money I spent on a product that is being unused.  

I went to Convention this year and decided to try out Paper Pumpkin with the kit they were offering free to those of us who visited the booth and wrote what we would use that month's kit for.  Well, that kit changed my mind.  It was a cute cute mini album that I could put together in a couple of hours.  So yes, I signed up.  And yes, the boxes started collecting in my studio over the fall as I dealt with the hospital, care agencies, etc getting my mom set up in her supported housing unit and the various emergencies I have had to deal as my mom's only caregiver/family in the area.    During these months I was neglecting my creative time.  Which deep down in my soul I need for my own sanity and this last  1 1/2 years I needed it.  But like most people, I put that me time on the back burner to focus on what needed to be done for not only my own children and husband but now an ageing parent having a health crisis in a town 1/2 hr away. 

 I didn't have the large blocks of time I like to have to focus on projects but I did have a growing number of Paper Pumpkin boxes sitting in my studio, unused. So I decided back in January to start opening up those boxes and making the projects based on the idea page inside.   I was mentally and emotionally burnt out, the creative juices were stalled, no they felt dead dead dead.  LOL   It was perfect.   In a matter of 30 minutes to an hour I had completed the project inside the box.  Be it a set of cards, a mini album, etc.       It got my creative juices going once again.   And it is helping me regain some of the sanity I thought I lost over the months.  LOL  

Here is the cute little box it comes in.  Not only do I stalk my UPS man, now you can add FedEx man to my list of favourite men in my life.  Dave is and always be number 1, but these guys bring me boxes of fun.  LOL


Every month the special project is wrapped in this fun blue tissue paper.  And this time of year in Ontario it is a color that brightens my day.  Makes me think of spring!!


This months kit and they have now switched the kit stamps to photopolymer.  Love it!!!


Here are all the kit components.  All I need is a block or two for the stamps and addhesives.  The kit this month is a set of four gift bags to decorate.  Love it.


Thursday night I hung out with a group of friends here in town.  We get together two Thursday nights a month to socialize and craft.  And we are called the Scrappy Janes.     And here is a bag that I completed that night.   How cute is that.  Whatever sentiment you want for the bag is up to you.   I chose thanks, it could be hello, celebrate, happy.  Customize the bag to suit your needs.

I also completed another Paper Pumpkin kit.  And for me to get even one project done during those nights is a huge accomplishment.  I get too busy talking and eating to get much done normally.  lol   Two have two kits was awesome!!!


If you need a creative outlet but short on time and energy, I highly recommend Paper Pumpkin.  The price is right and sometimes they throw a little something extra special in the box.   How does it get better than that? Why yes, it does get betteR, new prescriptions, I mean new memberships of Paper Pumpkin get a set of free markers!!!  A $19.95 value for FREE!!!

Contact me today and sign up!!   You won't regret it!


Thanks for stopping and visiting.  I can be reached at riajenkins@rogers.com


Thursday, February 27, 2014

Its Been a Roller Coaster


Hello!!!  Are you cold?  I am today.  A wind chill warning was issued for my area today and boy do you feel it when you step out.   And a freak snow squall which was literally a wall of snow as I was driving into town to drop Dalwhinnie off at the groomer made driving interesting this morning.  

I just wanted  to catch everybody up on what has been going on in my life.  Why I have been not posting as regularly as I have hoped to.     And I will try to be brief as possible.  It has been a long year and a bit.  

 It has been a whirlwind few months for me capping off a crazy year and a half.  As many of you know my mom has been very ill the last 1 1/2 yrs.  She had surgery to remove a cancerous growth on her bowel Sept 2012 and things did not go well, she ended up in emergency surgery a week later and another emergency surgery the following week again.   In and out of ICU, and then in hospital until early Nov. 2013.  She ended up with an ileostomy, a drainage tube wound that will not heal and a permanent PICC line in her arm She was put in supportive housing, her own apartment but with Support Workers coming in a few times a day to help with meal prep, personal care etc. and nurses visiting  1-2 times a day to help her maintain her PICC line for hydration therapy, her kidneys are not functioning properly, and wound care for the drainage tube wound.  

 Since her initial discharge from hospital in early November 2013 until today she has been in her unit a total of 8 weeks.   She was re-admitted the morning of December 26 and had surgery January 2 in a major teaching hospital in London, Ontario for bypass on her legs for peripheral vascular disease that was diagnosed earlier in the fall.  The pain was not being controlled with pain killers and her feet were discoloring and developing ulcers.   Because of her current health condition they were unable to use her own veins for the bypass, they ended up using plastic veins.  After a lengthy hospital stay and rehab she was discharged January 31, to end up in hospital again on Feb. 20.   Shortly after discharge the visiting nurses noticed that her right leg wasn't looking right, turns out the surgery didn't work in the right leg.  We had an urgent visit with the surgeon, who confirmed that her veins were blocked again, the surgery didn't work.  There were  two options.  The first was to leave it alone, the nerves and flesh would die off, the pain that was already unbearable would continue and ulcers would develop. Or the other option would be amputation below the knee of the right leg.     After another emergency ward visit a couple of days later, we decided to go ahead with amputation to help with her quality of life.   Last week was a whirlwind of activity and emotions on top of all the  activity and emotions that I was dealing with the last year and a half.  We got the call there was a bed for her and on Thursday, Feb. 20 she was admitted with hopes to do the surgery the next day.  But surgery was postponed because she was too dehydrated, again her kidneys not working properly.  So they ended up doing the surgery very late Saturday night.  We were able to visit her the next day, my oldest daughter Laura goes to university in London and we had to bring her back at the end of her reading week.  My mom was in good spirits and it helped that one of her room mates had the same surgery as well.  

She was transferred back to the hospital in the town where she lives.  Where she is awaiting a bed in rehab where they will work with her to get as well as possible.  And we will be working with the local Community Care Access Centre of where is the best place for her to live.   Still a long road ahead, but we are learning to take things as they come.   

Through it all I have learned a lot about what I am capable of. And learned to navigate the realm of senior care here in Ontario.  While it is not perfect, I am grateful for our health system here in Ontario.   We have paid hardly anything out of pocket for her care, the support workers and visiting nurses are all covered by our provincial health plan.  While a lot of nursing homes won't take my mom because of the PICC line and that is a whole other story and I did say its not perfect, she is on the list for an excellent nursing home in her town, and if urgent there are other facilities in southern Ontario that we could have her admitted to until a bed becomes available in the home of her first choice. And we have OHIP subsidies to help cover the cost of her care while in a nursing home.   But for now she is still in hospital which at this time is the best place for her to be.

In the midst of this roller coaster ride I have made time for creativity.   And with Sale-A-Bration on I had to play with some more of my FREE products.   This card I copied directly from the Sale-A-Bration catalogue. I am loving the FREE product this year.  


Thanks for dropping by my little corner of the blogging world.  Take care.


Monday, February 3, 2014

See Ya Later Alligator


Happy Monday world!!   Call me a freak but I like Mondays.   Monday means a new week full of new possibilities.  And I am a big believer that attitude is everything and life is what you make it.  And I love the fact that we are having a real winter this year. (some people look at me like I have four heads when I say this)   I love snow,the way it turns what is a dull grey landscape into a blanket of snow glistening in the sun.  We had another storm come through again on Saturday and it gave the landscape a touch up.  This is what our backyard looked like yesterday.   Today we have some brilliant sunshine and it is gorgeous!!!   And yes, that is a fallen tree at the back of the property.   It fell during the ice storm the weekend before Christmas and with all the snow we have had, the tree people have not been able to come out and give us a quote yet.  And yes, we are going to be getting a lot of fire wood for our outdoor fireplace.  LOL


As you know from my previous post we have started Sale-A-Bration last week.  And of course as a demo, one of the perks was being able to get the Sale-A-Bration items in December.   Here is a card I made using a couple of items of the sale-a-bration catalogue.  And it was part of a class I taught last week to promote Sale-A-Bration.  


Products used are as follows:

Stamp Set:  See Ya Later (FREE!!!!)  This is has to be my favourite stamp set in Sale-A-Bration this year

Ink:  Gumball Green Classic Ink Pad (Main Idea Book and Catalogue)

Cardstock:  Whisper white, Gumball Green, Silver Glimmer (Main Idea Book and Catalogue)

DSP:   Watercolor Wonder (Occasions Catalogue)

Punches and Dies:  Banner Framelits Die and Chevron Border Punch (Occasions Catalogue) Small Heart Punch (Main Idea Book and Catalogue)

Textured Embossing Folder:  Decorative Dots (FREE!!!)

To see all the products that you can get for free with a qualifying purchase of $60 or more, contact me today!!!   riajenkins@rogers.com

Thanks for stopping by on this cold February day (well at least cold here)  I would love to hear from you!!


Wednesday, January 29, 2014

Three Item Class.

How are you on this cold January day?  I am warm and cozy in my studio getting it organized after a weekend of whirlwind activity.  Too many items are not in their homes right now.  LOL  Amanda is done exams, Daniel is home sick with a nasty cold so I have retreated for some mom time as I hear the Dr. Who marathon going on in the upstairs family room.  


  Please join me for this this three item class. Using items from our new occasions catalogue, we will be making two cards and a treat holder.  The cost of the class is is $12 or free with a $30 order.

DATES:   

Sunday, February 9, 2014 -  1 pm - 3pm
Wednesday February 12, 2014  -  10- 12 pm.
Thursday February 20, 2014 - 7 pm - 9 pm


And Sale-A-Bration has begun!!!  Between now and March 31 for every $60 you spend you can pick an item from the Sale-A-Bration catalogue for FREE!!!!  Yes FREE!!!!!!  How does it get better than this.  Host a workshop or class during Sale-A-Bration and get $40 extra in hostess dollar on qualifying parties.  And to make it even better, become a demo now!!!  When you sign up you can pick $190 of products of your choice for only $125 and get a 20% discount for yourself on Stampin' Up's amazing quality products.  Normal fee for signing up for a demo is $155, you get an extra $40 in exclusive Stampin' Up! product.      


To enrol in one of the above classes or to learn about Sale-A-Bration and how to earn products for free contact me today.  riajenkins@rogers.com

Thank you for stopping by my little corner of the blogging world.  Stay warm my friends.  


Thursday, November 14, 2013

Christmas Ornaments Stampin' Up! Style


Hello again!!  I am in full Christmas mode right now.  Started my Christmas shopping and I plan to be done by the end of November.  My goal is to not set foot in a mall if I don't have to for the month of December.  I like to use December to focus on baking, meal planning, wrapping and cozy nights at home with my family when I can.  

In my post yesterday I mentioned working my upline Denise's Moonlight and Mistletoe Retreat in Niagara Falls a few weeks ago.  I brought my Christmas tree along (first time I ever brought my own tree to a crop) and we decorated it with different ornaments made using Stampin' Up! products.  Our color theme was using Bermuda Bay, Pool Party, and Silver Glitter.   

The first three ornaments I made using components from the Christmas Banner Simply Created Kit.  I love banners but I do not have a place for one in my Christmas decor.  So why not use the components for other items such as Christmas Tree ornaments.  Here are three of the ornaments I made and I still have plenty of the kit pieces left over for other projects.  


This second ornament was a little difficult to photograph as it is 3D in nature.  Using the lattice die in our main catalogue I cut out six lattices per ornament out of our Silver Glimmer Paper.  I used Tombow to glue the Lattice die cuts together.  First I folded each one in half and adhered them together for a 3D snowflake effect.  I then used a piece of Whisper White 3/8" Taffefta Ribbon through the top to help hang the ornament on the tree.  I love Silver Glimmer in these ornaments, they catch the lights on the tree beautifully and you can never have to much glitter.


Thank you for stopping by and visiting my little corner of the blogging world.  Comments and suggests are always welcome.  Enjoy your day!!

Wednesday, November 13, 2013

A Washi Kind of Christmas


Hello again.  It has been a busy time here in the Jenkins household.  I was away working my up line's Moonlight and Mistletoe retreat in Niagara falls the end of October. We are starting to plan for next year's retreat and I am having a more active role in planning Moonlight and Mistletoe 2014, so exciting.    We found a place for my mother and moved her out of the hospital (over a year in the hospital, that has to be some kind of record) the first weekend of November and things are starting to settle into a rhythm for her with a nurse coming by twice a day for her IV, another nurse for wound care of her abdominal area and of course Red Cross Support Workers coming by a few times a day to make sure she is eating (which in our family is not an issue, lol), and to help with personal care and light housework.  Our oldest Laura, has impacted wisdom teeth and she had her appointment with the oral surgeon a few weeks ago as well and her surgery is scheduled for December 23, so lots of mashed potatoes and gravy with a side of pain killers for her Christmas eve and day.  Unfortunately we will not be having our traditional Christmas Eve dinner of Peking Duck and Nasi Goreng (Indonesian rice dish), which is Laura's favourite meal, rice and holes where her wisdom teeth use to be will not be a good combination.  I am going to have to get creative and think of something else for Christmas eve that everybody will like. 

And speaking of Christmas, it is coming up fast and you are probably planning your Christmas card list.  I am sure you are finding that everywhere you look Washi tape is being used in all kind of papercrafting and home decor projects.    For this time of year I am offering  a Washi Tape Christmas Card class.  In this class you will make four different cards using Washi tape.   Get a feel of how versatile and easy this product is to use in your various projects.  


DATES:  Thursday, November 28       7:00 pm - 9:00 pm
                 Sunday, December 1            1:00 pm - 3:00 pm
                 Tuesday, December 3            10:00 am - 12:00 pm

COST:      $10  includes everything needed to make four cards and envelopes included.  Or place a $30 order and attend for free!!!

Email me at riajenkins@rogers.com for location and payment of fees.  Looking forward to seeing you!!

Tuesday, October 8, 2013

Spooky Banner Class


Hello!!!  It’s hard to believe Thanksgiving is this weekend.  Which means Halloween is just around the corner. I love Halloween, and in the current Holiday Catalogue we have our Build a Banner Simply Created Kit with stencils and pennants,  along with a Halloween Accessory Kit.   Please join me in a class featuring our Build a Banner Kit and Halloween Accessory Kit.  You will be given everything you need to complete the banner pictured above.  

Date:  Tuesday, October 22, 2013
Time:  6:30-9:30
Place:  My home
Cost: $30.00

Please RSVP with payment by Monday, October 14 so I can make sure all supplies needed will be available.  You can reach me via email riajenkins@rogers.com or my cell 519-577-1321


And if you love retreats, I will be teaching a Christmas Card Class at my upline’s Moonlight and Mistletoe Retreat later this month in Niagara Falls.  You can go to Denise’s blog for more information and registration at:  www.craftdbear.com .   Link is in the right column of her blog.  

Thanks for stopping by and visiting.

Wednesday, September 25, 2013

Discovery Day Craft


Hello again.   Hard to believe that September is coming to a close.  Our pool was closed the other day, the leaves are starting to change color and we have had a few nights of frost.  I love the change of seasons.  Fall is amazing, Thanksgiving is around the corner, then Halloween, which leads us right into Christmas, which is three months away from today.  And yes, I have started to plan Christmas already.  LOL

A few weeks ago I participated in a Demo Discovery with my uplines Denise and Jamilla.  It was a good day.  Lots of learning and crafting going on.  One project was the canvas below.  Jamilla taught this workshop.  Of course there wasn't enough time to finish, so I finished it here at home.  If you stopped by our booth at the St. George Applefest this past weekend you would have seen this on display.  

This is a basic canvas, 8 x 10 I believe,  that can be picked up at any craft supply store or dollar store.  What you do with it is up to your imagination.  

I followed Jamilla's basic template, except for the word "CREATE"  Jamilla stamped her word and colored it in with Stampin' Write markers.  I knew I would totally destroy the canvas if I did that.  Instead, I cut the letters for "CREATE" using our Coaster Board, cut with the Bigshot using the Typeset Alphabet Bigz die. And using sponge daubers I distressed the letters with Early Espresso Classic Ink and Gold Metallic Ink.

The rest of the project uses banners and stencils from our Build a Banner Simply Created Kit, and used sponge daubers to stencil the patterns on the canvas and pennant, the twine is included in the kit.   The bow was cut using our Gift Bow Bigz L Die (one of my top five favourites from the holiday catalogue) and flowers were punched with our Pansy punch. Behind the bows and flowers, which the picture doesn't show too well is a Tea Lace Doily.  Butterfly was punched with our Bitty Butterfly punch.   Stamp sets were Feels Good and Everything Eleanor.


Close up of the distressed "Create"


Close up of flowers and bow (love love the bow, I am going to have so much fun over the Christmas holidays with this bow die)


Tuesday, September 10, 2013

Laura's Birthday card

Happy Tuesday morning!!   Around here it is hot, hazy and humid.  We are going to be breaking some records around here.  It is suppose to be 35 degrees with a humidex of 44 degrees.  That is in Celsius.  In Fahrenheit for my American friends and family, that is 95 with a humidex of 114.  Yep a brisk Canadian September day around here.  Something tells me that air conditioning is making the list of what I am thankful for in my gratitude journal tonight.  LOL  I dropped Dalwhinnie off at the groomer this morning as well.  I think she is going to be very grateful to lose the excess fur for the next few days.  

I posted a pic of this card earlier on my Instagram, which was shared on Facebook and Twitter as well.  A couple of days before bringing Laura to University, she had her 18th birthday.  So hard to believe that my baby is 18 and away at University.

This card was simple, quick and easy.  Things were rather hectic around here the weeks leading up to her birthday so I needed to throw this card together quickly.  And thanks to co-ordinating products via Stampin' Up! mission was accomplished.  


Products used were as follows:

Cardstock:  Basic Black, Very Vanilla

Designer Series Paper:  Modern Medley

Stamp Set: Chalk Talk

Ink: VersaMark

Embossing Powder:  Black, White

Tools:  Big Shot, Chalk Talk Framelits

Embellishments:  3/8" Basic Black Taffeta Ribbon (discontinued)

Thank you for stopping by and visiting my little corner of the blogging world. I think this afternoon you will find me poolside.

Friday, July 26, 2013

I'm Back From My Salt Lake City Adventure (picture heavy)

It has been quite a whirlwind of a summer so far.  Between birthdays, father's day, dance recital, dance exams etc.  And of course Stampin' Up! convention in Salt Lake City.  I returned from convention late Sunday night, Monday was chill and unpack, Tuesday took my mom to the dentist, and I have been sick since Wednesday.  We are suppose to go to my in-laws for a big family get together tomorrow, but I just might be staying home.  Still feeling kind of crappy and I have a low grade fever.   

Now back to my Salt Lake City Adventure.  After a year full of incredible lows and highs I needed this get away.  I met two of my team mates, Natasha and Gail, at the Detroit Airport and we arrived in Salt Lake City on Tuesday afternoon.  At the airport we found welcome signs everywhere, including a special priced shuttle to the Hilton where we were staying.  


We had dinner at the Olive Garden and wandered around the city.  I found Salt Lake City to be a gorgeous city.  It is surrounded by mountains, and there is an overall feeling of contentment as I wandered the core area around the convention.  We noticed that there were Stampin' Up! flags attached to all the light posts.  It is Stampin' Up!'s 25th anniversary, and they were getting ready to throw an awesome party!!!


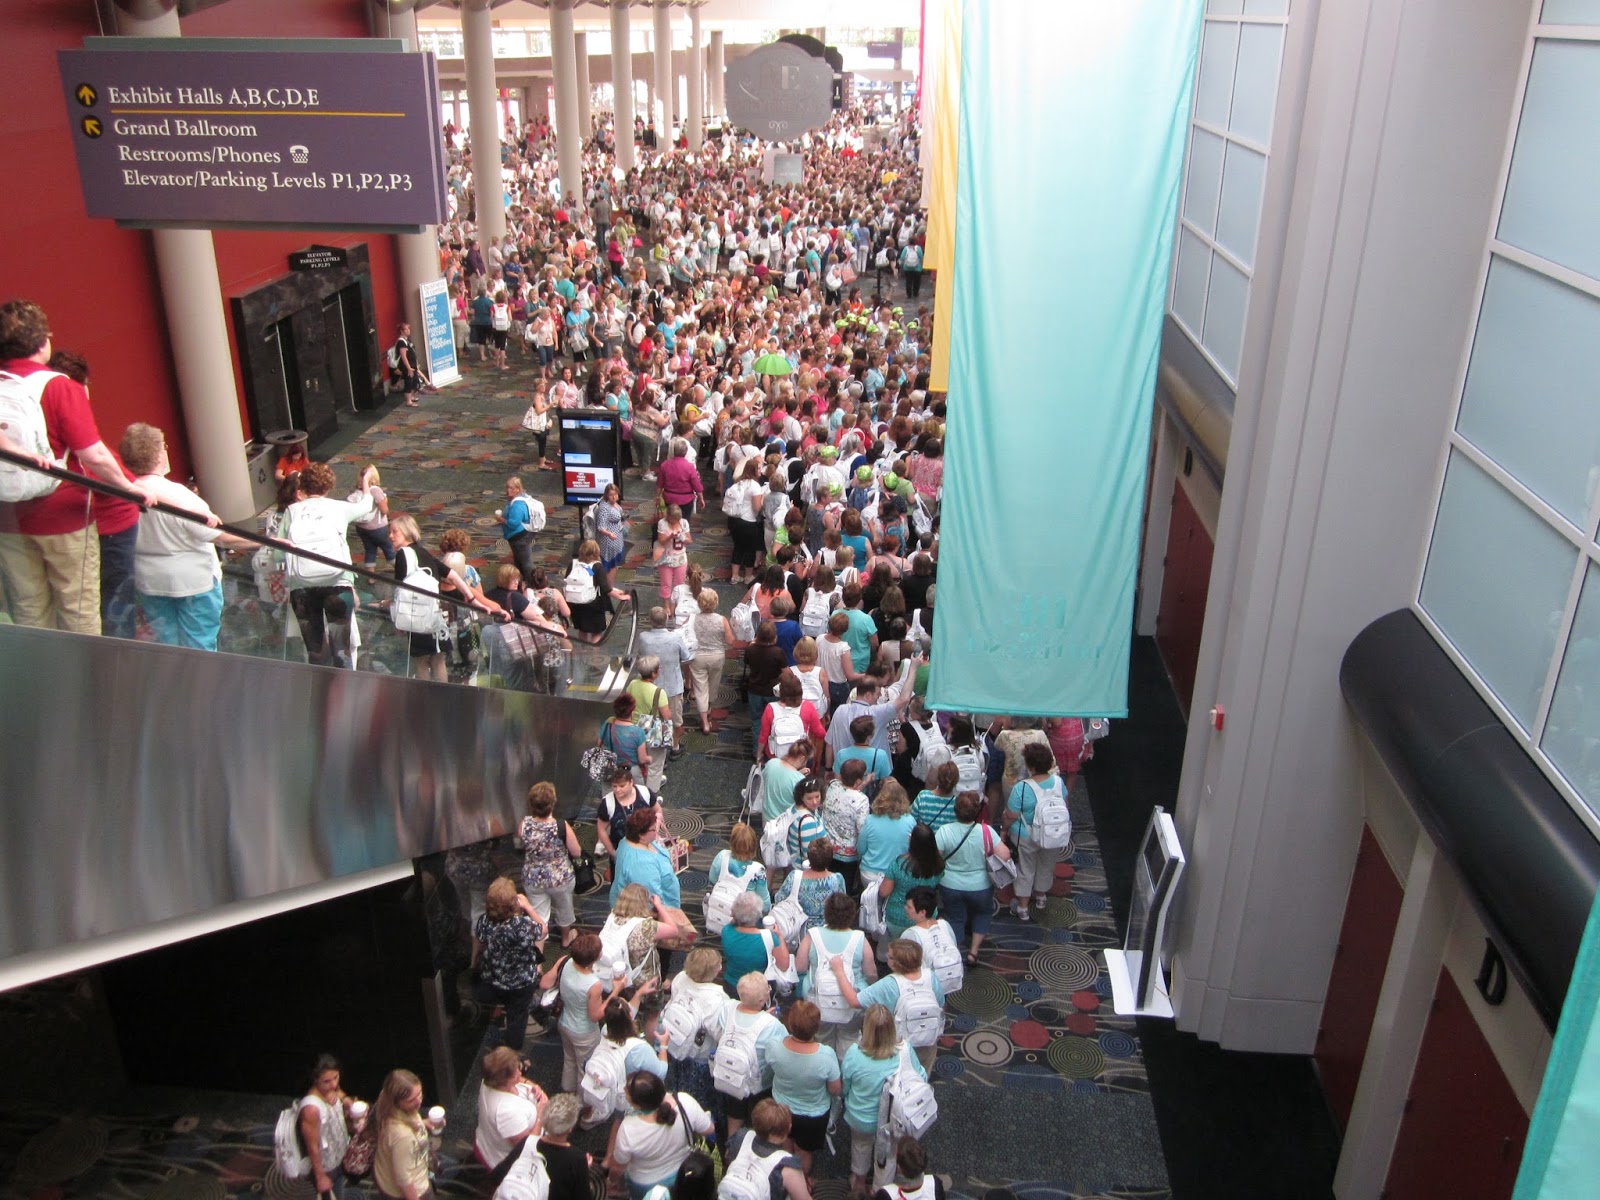
The convention centre.  This place is huge, and it had to be as there were about 6,000 of us attending convention this year.  


Wednesday I slept in, enjoyed room service breakfast and met up with everyone for a day of shopping at the City Creek Centre and dinner afterwards.

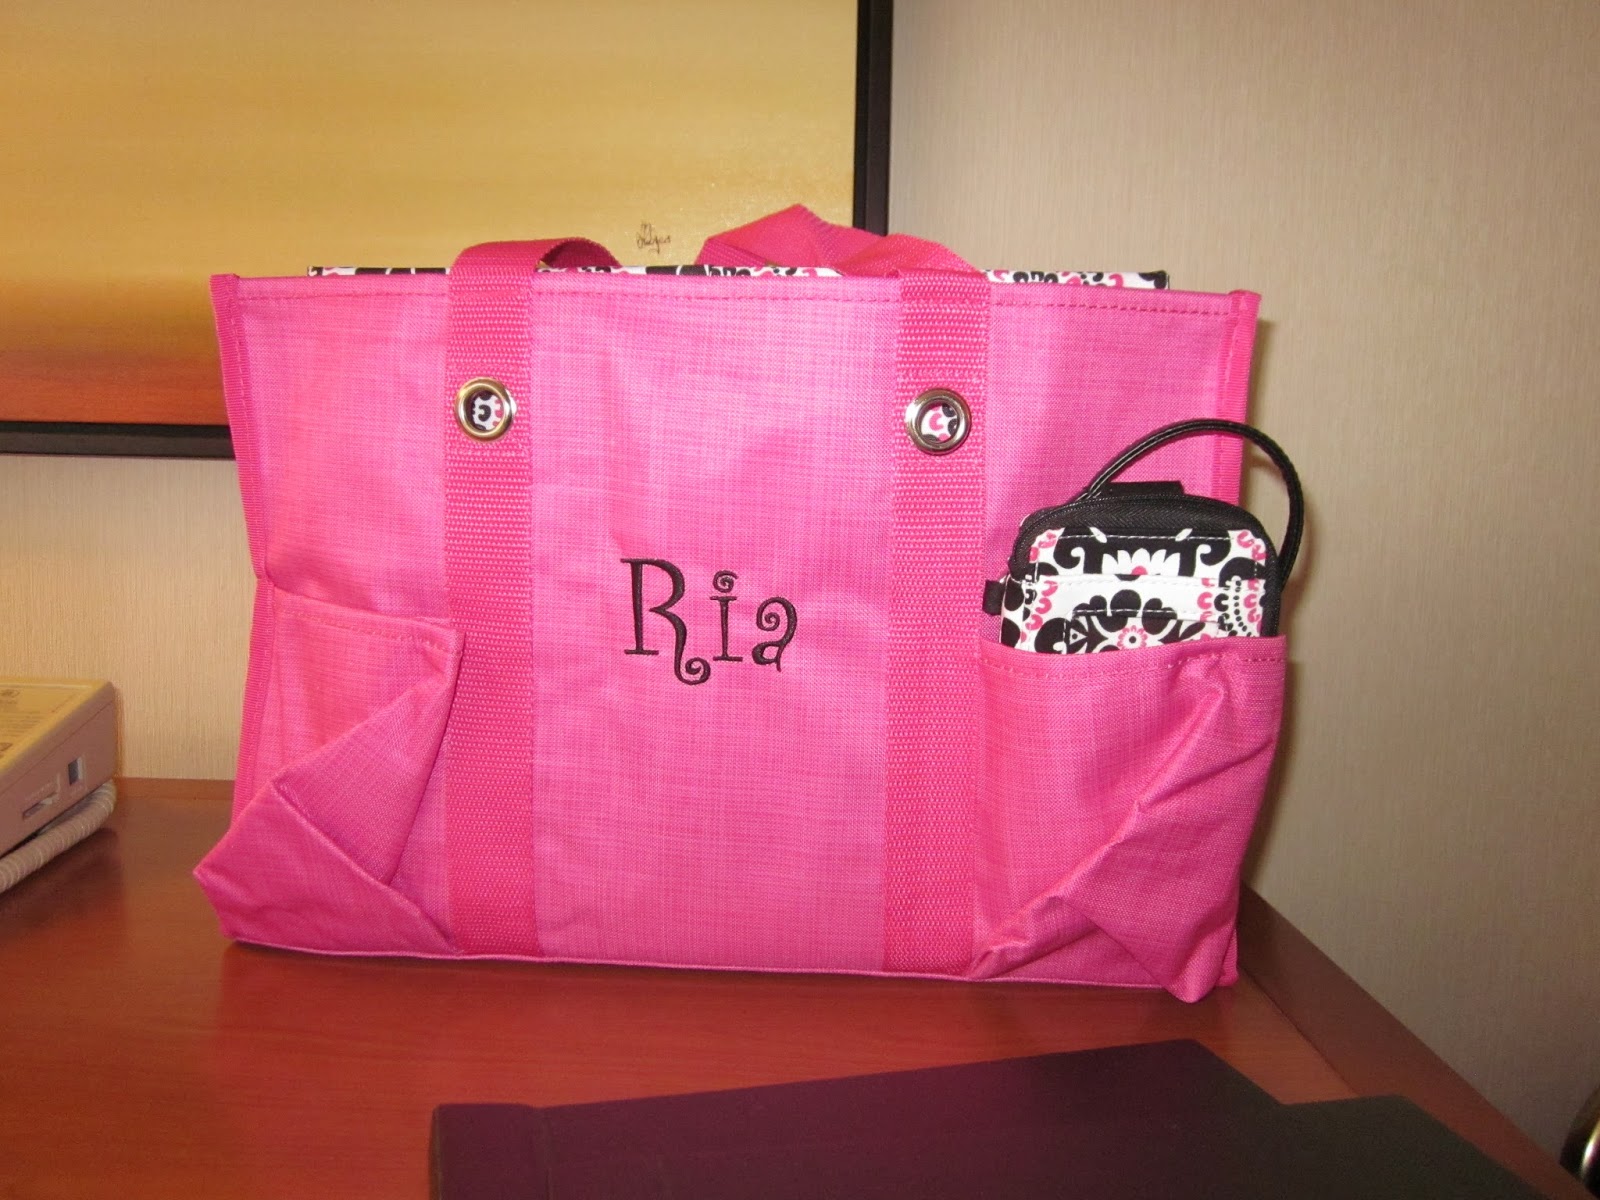
During convention many of us noted it was more than just a Stampin' Up! convention, it was also a ThirtyOne convention.  I swear there were almost as many Thirty One bags as there were attendees.   I of course brought my own as you can see below, it has my name one it.


View from my room at the Hilton.  Not bad.  LOL


Convention was amazing overall.  Information overload by the time it was over Saturday night.  But worth it.  And all the free stuff I took home.  WOW!!!  Stampin' Up! knows how to spoil their demonstrators!!!


Thursday we started our day with a tour of the head office in Riverton.  I volunteer to work there for paper crafting supplies.  What an amazing place!


The room where all our orders are processed, packed and shipped.  I should say a small corner of the room.  This place is huge!!!


Our statement of the heart at Stampin' Up!


A small part of the idea board where it appears a lot of brainstorming goes on to bring us all those new amazing stamp sets etc that we all love.


With a view like this I would work here in a heartbeat.  I am sure Dave won't mind the commute to Mississauga ;)


Inside the facility.   Why yes, I would enjoy my lunches in the atrium by the waterfall when I am at work.


Friday was a busy day of general sessions, expo, mini classes etc.  Here is a small group (emphasis on small) of demonstrators from all over the world waiting to get into the main stage for one of the general sessions.  Later on this view was wall to wall to wall people.


Friday night was awards night, and I got to cheer on a number of members of my team who won various awards.   What an amazing group of women I work with.

Afterwards was the party.  And Stampin' Up! knows how to throw a party.  There was a live band, dancers, walking tables (actually girls dressed up as tables), cupcakes, lemonade, and more.  And the highlight was two gymnasts doing routines from drapes hanging from the ceiling.  At first I thought there has to be some foam pads underneath them to break their fall if something should go wrong.  But nope, there was just the concrete floor.  Amazing.


Saturday was more in-depth classes, and two more general sessions.  Sunday I came home with my luggage weighing a lot more than it did going there.  Now to sort through all the ideas and concepts I learned while there.   

Thanks for stopping by and visiting my little corner of the blogging world.   I am off to have some tea and honey for my throat.  Take care


Wednesday, May 29, 2013

Only A Few Days Left!!!!!

I can't believe how quickly Friday is coming as I gather items together for my catalogue launch.  Things are busy with the backyard project, closing of my mom's apartment, end of school year activities such as recitals and field trips.  With all the craziness in my life its nice to be able to slow down and focus on scrapbooking and cardmaking when I can.  

Here are some more elements of a Scrapbook page I am working on.  I was trying to achieve a wrought iron effect to go with the iron in the pictures (which you will see eventually :).  I used a piece of 12 x 12 Basic Black cardstock and ran it through my personal electronic die cutting machine to achieve this wrought iron effect as one of my layers.  But it was looking too black, and this where the playing comes in.  I sponged on Illuminate Glimmer Watermark with a piece of our Stamping Sponge (both items can be found in the new catalogue).  I loved the effect which of course got my gears turning and I started to see different cards (think halloween) and layouts in my mind.   Hopefully these pictures captures  the effect.  


Here is the wrought iron on a piece of 12 x 12 Crumb Cake Card Stock ink with images from the French Foliage stamp set.  Sadly this favourite stamp set of mine is being discontinued and is available only until Friday.


Two more items being discontinued from our line of products are our Soda Pop Tops and the Collage Curios stamp set.   I love how this stamp set co-ordinates with the Pop Tops, add a generous helping of Crystal Effects (which is not being discontinued) and you have sweet custom embellishment for your project.


Thank you for stopping by and visiting my corner of the blogging world.   I look forward to possibly seeing you Friday night for my catalogue launch at my home.  Enjoy your day!!!

Friday, May 24, 2013

Flower Trim to Dye For


It is hard to believe there is only one week left until May is officially over.  On May 31 not only comes a new catalogue, but saying goodbye to both the 2012-2013 main catalogue and the 2013 Spring Catalogue and many of the items in these catalogues will not be carried forward.   

I am currently working on a layout from our D.C trip, and wanted to dye some of the Flower Trim found in the spring catalogue.  The trim is a gorgeous colour all on its own, but I need a different look for what I have in mind.  And what is so fun about the Flower Trim is with some Stampin' Up! re-inkers and water, you can create your own personalized trim.   

For my Fun Friday experiment I put several drops of different re-inkers in little plastic containers with some water and put a couple of flowers from the trim in each container to see which one I like best for my layout.  The re-inkers I used are Early Espresso, Chocolate Chip, Regal Rose, and Rose Red.  For the fifth container I mixed Chocolate Chip with Rose Red, with more Red than Chocolate.   

You can see the results in the pictures below.   Right now I am leaning towards either the Rose Red or Regal Rose.  When everything is dried completely I will lay them on my layout and make my final decision.   


I love how they all turned out and I am pretty sure what colour doesn't get used on this layout will be used on a card at some point.   This Flower Trim will be gone after May 31, get yours now before it is too late.

Thank you for stopping by and visiting my little corner of the blogging universe.  I love to see your comments and suggestions. Bye for now!!

Tuesday, May 14, 2013

A New Catalogue Sneek Peak

We are counting down until the new Stampin' Up! Catalogue is live on May 31 (yes a day early since June 1 falls on Saturday) so as a double bonus, the new and old catalogues are active on the same day.  Sweet!!!  I have the new catalogue in my hot little hands for a little while now, and I can't wait to share it with you.  My poor budget is going to need some adjusting to accommodate my wish list.  Sorry family, looks like a Kraft dinner and hot dogs kind of summer, lol.  

As demonstrators we are able to order from a select list from the new catalogue and play.  While, we are not allowed to show you the actual products, we can show you projects made with them.  

This past weekend was Mother's Day here in Canada and the U.S.  My mother is still in the hospital, awaiting a room to free up in a long term care facility in her town.  Saturday, after I hosted a garage sale here at my home, I packed up the kids and gifts, cards, food (don't know about where you live, but here in Ontario hospital food can be blah)   and went to visit Mom/Beppe (Frisian for grandma).   

Below is the card I made for my Mom.  

Products used are:

CARDSTOCK:  Melon mambo, and  Whisper White

MARKERS:  Always Artichoke, Melon Mambo, Rose Red, Marina Mist

STAMP SET:   Wildflower Meadow Background Stamp (NEW CATALOGUE!!!)

EMBOSSING FOLDER:  Wildflower Meadow Textured Embossing Folder (NEW CATALOGUE!!!!)

I coloured directly onto the stamp it self and used the "huff" technique (breathing on to the inked stamp) to moisten the ink after colouring the images.  What is fabulous about this stamp set and embossing folder is how they co-ordinate together.  The image of the whole card doesn't capture the embossed image as well as I would have liked it to.  I did a closer shot on an angle in the second photo to help show you the embossing of the stamped image.  Gorgeous!!


I hope you are having a fabulous week so far.  Thank you for stopping by and visiting my little corner of the blogging world.  As always, comments and suggestions are welcome.

Tuesday, April 10, 2012

New Items in the Clearance Rack

Stampin Up! has put a number of new items on the online Clearance Rack.  A lot of punches at sweet prices.  Go and check it out: Clearance Rack  You can order online or contact me directly at: riajenkins@rogers.com to place an order.

And watch this page for upcoming lists of items that will be  retired in anticipation of the brand new catalogue coming out June 1.  So exciting!!!  

Wednesday, April 4, 2012

Three Item Class


Please join me Tuesday, April 17, 2012, 7-9:30 pm.  For $10 you will make two cards, and a treat tube. Card #1 uses the technique of acrylic painted and embossed card stock.  Card #2 we will be playing with our new Edgelits dies and embossing folders to make a gorgeous Mother's Day card.  And project #3 will be making this versatile treat tube using our amazing Simply Scored Tool, this treat tube can be birthday party favours, treats for showers, or for any special event you have.

Contact me at riajenkins@rogers.com or register for this class through my Stampin' Up! website here.